
Build electronic forms with Excel and use Paypal for payments.
For SpreadsheetConverter v12, see the current help, installation guide or product tour.
Earlier versions: show the original page
PayPal payments
Build electronic forms with Excel and use Paypal for payments
SpreadsheetConverter lets you create advanced order forms in Excel. When you publish such a form on the web, you may want to use PayPal for payments. This tutorial describes how.
So you want to start receiving orders from the web, with electronic payments?
An easy solution is to use PayPal. All you need is a PayPal account which allows you to “sell online”.
Online demo
To see an example, try the online demo. Enter a few quantities and press Submit.
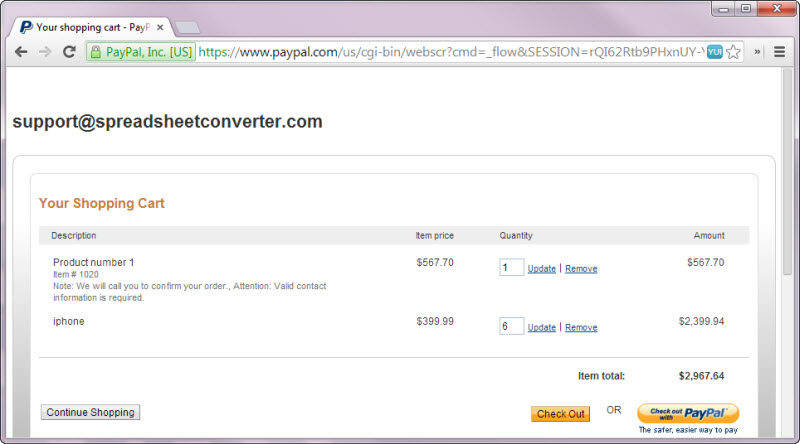
When you click Submit, you are redirected to PayPal. After entering an address, credit card information etc, you press Order. PayPal verifies the information and performs the payment transaction.
We, the seller, get two e-mails:
- One from SpreadsheetConverter with a list of the things you ordered.
- One from PayPal saying that you performed the payment.
It is that simple to start getting paid for your products and services!
Step-by-step tutorial
To use a simple payment solution like this:
- We created an order form in Excel. with a link to PayPal in a hidden text field.
- We converted the Excel spreadsheet to a web page with SpreadsheetConverter.
- We published the order form on our website.
You can download the example spreadsheet.
Unhide the hidden columns
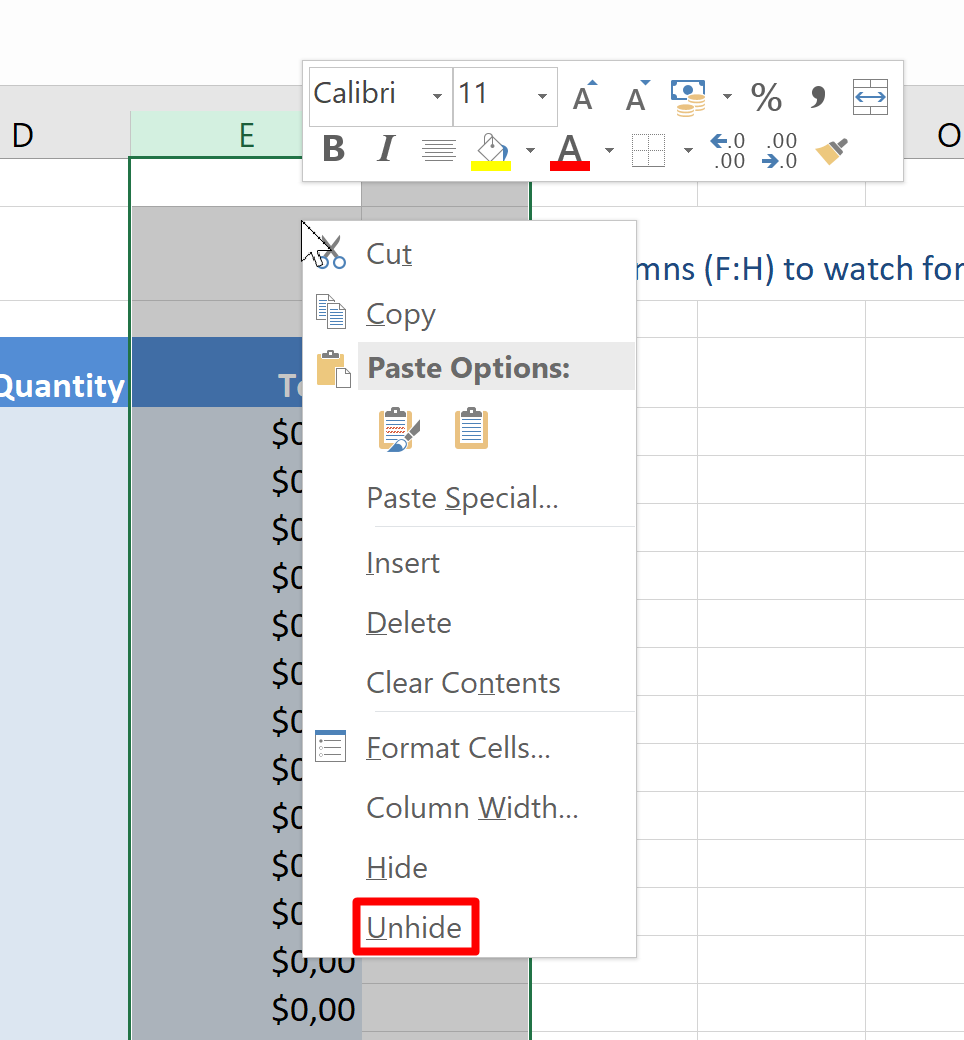
In the example spreadsheet, columns F-K are hidden. To unhide them, select columns E and L and right-click anywhere in the selection.
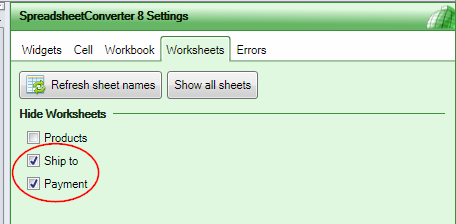
You can also put the background information on separate worksheets and hide the entire worksheet on the Worksheets tab of the task pane.
Examine the columns in the spreadsheet
- Column B is the product name.
- Column C is the unit price.
- Column D is the requested order quantity.
- Column E is the item price.
- Column F is used as a suffix in the parameter names used in the link to PayPal. It contains 1 for the first ordered product, so the parameter names for the first product become item_name_1, quantity_1 and amount_1.
- Column G is 1 if there is a positive order quantity set for the corresponding product.
- Column H contains an accumulated count of ordered products.
- Column J contains the PayPal parameters item_name, quantity and amount of each ordered product. All these are concatenated into a string in J30 which is our shopping basket.
Set up a cell called xl_redirect_success with the link to PayPal
You insert the PayPal link in a cell in the spreadsheet with an equal sign”=” at the front to turn it into a formula. The link should include the item_name, quantity and amount parameter for each ordered product. Do not copy the link below; follow the instructions you get from PayPal.-
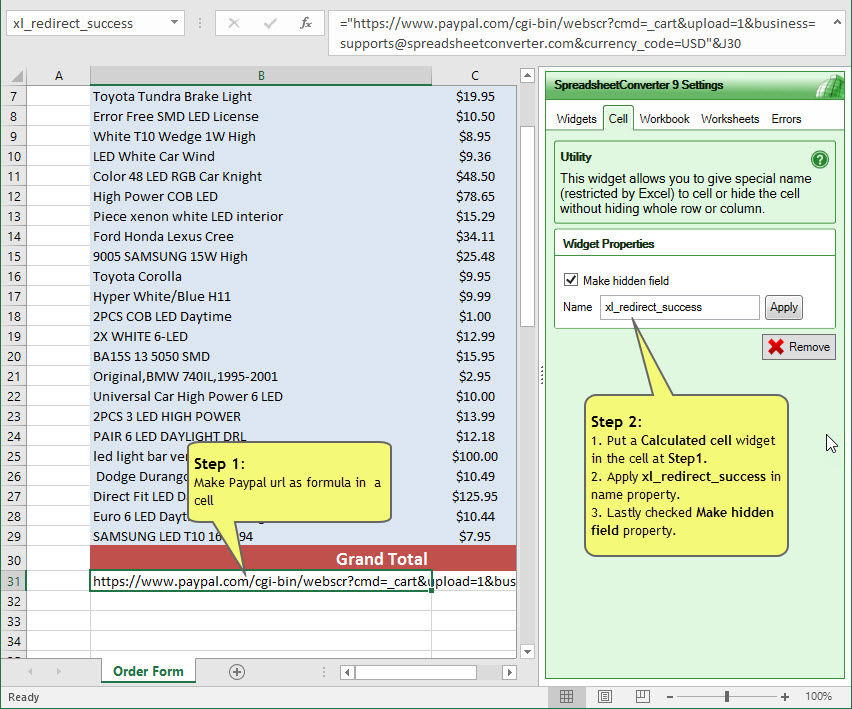
A minimal PayPal url is something like this:
="https://www.paypal.com/cart/add=1
    &business=support@spreadsheetconverter.com
    &item_name=iphone&quantity=2&amount=399.99"
However, there are many more separate fields you can send, for example “shipping”. For a complicated PayPal url, see paypal-sample.xls
Visit the PayPal website for more configuration information.
Enter your e-mail address
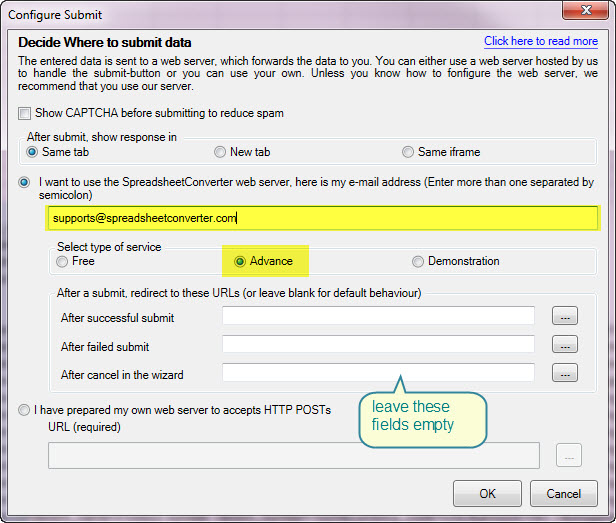
Open the Workbook tab in the task pane and click Configure submit.
Enter your e-mail address. There must be a PayPal account for the e-mail address and it must allow you to “sell online”.
Select what forms processing service you are using. Select Demonstration to view the contents of the order e-mail in the web browser. Select Advanced if you have a subscription to the Advanced Submit Service. Select Free to use the Free Submit Service that is included with your license for SpreadsheetConverter.
Rename the Submit button
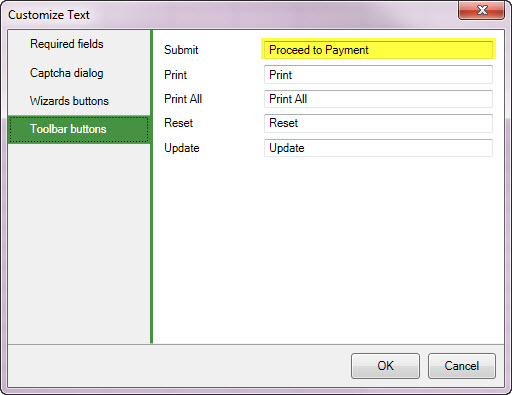
Submit is not a good title for an order button so we can change it. You can change the standard text in Options > User Settings.
Hide the hidden columns
Columns F-K in the example are supposed to be hidden. Hide them now if they aren’t. Select columns F-K, right-click somewhere in the selection and select Hide from the menu.
Convert and publish the web page
When you believe your form works as it should, convert it to a web page and test it in your local web browser. When you’re happy with the converted web page, publish it on the web.
Verifying that everything works
Open the uploaded web page using the link you got during upload and verify that everything works properly.
The numbers can be manipulated
If you redirect like this to PayPal from an HTML page, the values can be manipulated. Therefore, when you get an order you should always double-check that the total for the order is correct and that the customer paid the correct amount.
Tip: If you use the Advanced Submit Service, use the -quick.htm version
We generate two pages, a full version ending with .htm and a compressed one ending in -quick.htm. The full version contains information on how the e-mail should be formatted. This information only needs to be transferred once to our server. After you have submitted at least one form from the full version, you should use the compressed -quick.htm version to reduce data traffic.