
Choose the cells end users can change 
An input cell is a cell your end users are allowed to type into on the published page — a loan amount, a quantity, a rate. Cells that are not input cells remain read-only.
Choose an input mode 
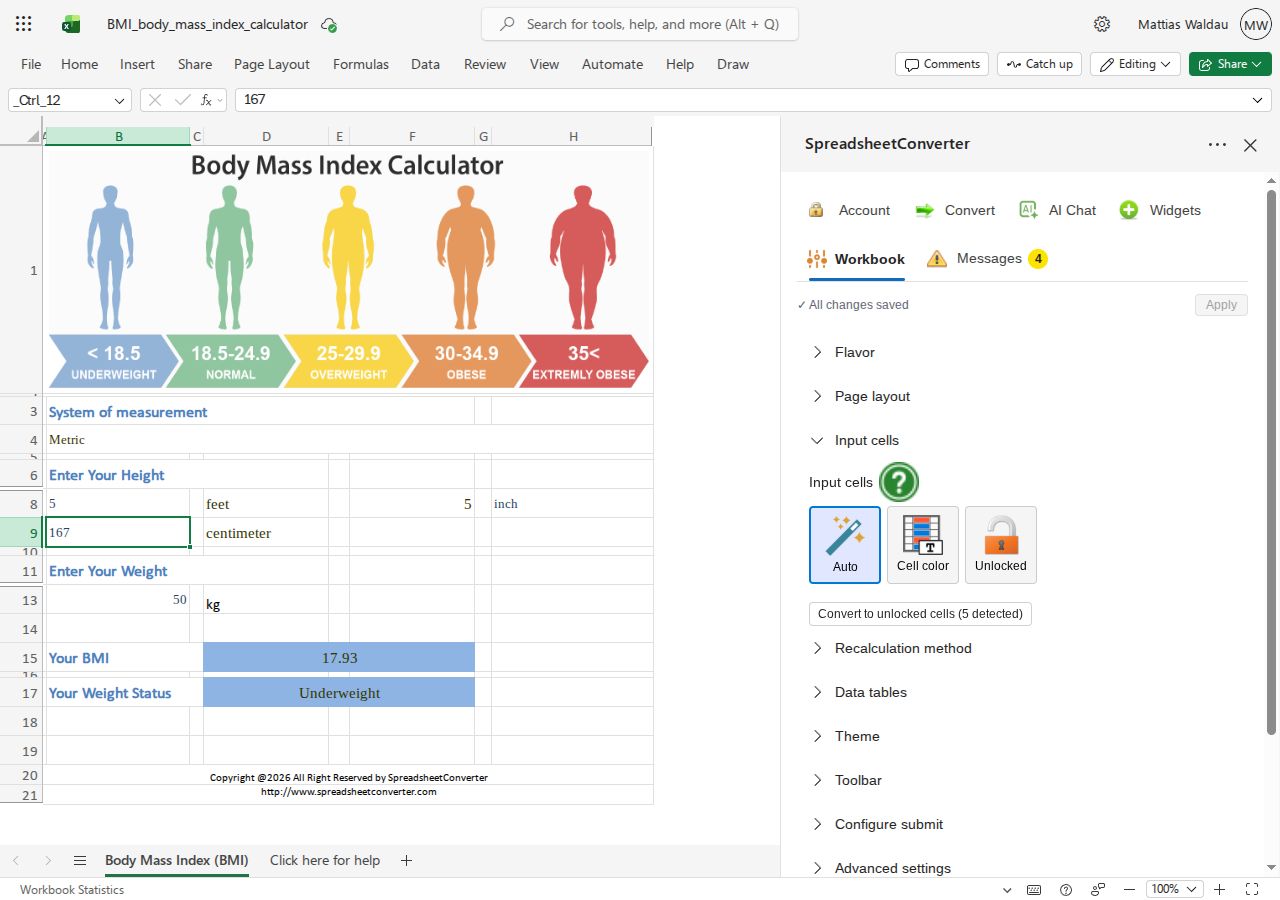
In the add-in’s Workbook tab, find Input cells. There are three choices:
- Auto: use the automatically detected input cells. Convert the workbook and review the result before publishing.
- Cell color: identify input cells by their background color. Select a colored cell in Excel, then use Pick colour. Use Re-pick colour when you want a different color.
- Unlocked: use the cells you have explicitly unlocked.
For Cell color, the option Ignore background color for input cells and make them white controls how those cells appear in the converted page.
Lock and unlock selected cells 
Select a cell or range in Excel and open the Widgets tab. Its Lock/Unlock controls apply to the selected cells. Unlock makes the selection available for input when the input mode is Unlocked; Lock makes it read-only.
Unlocking a selection while the mode is Auto switches the input mode to Unlocked. In Cell color mode, lock state is ignored for input detection; choose Unlocked if you want lock state to decide which cells end users can edit.
Keep automatically detected inputs 
In Auto mode, Convert to unlocked cells lets you turn the detected input cells into an explicit unlocked selection. Review the detected inputs from your current conversion before making that choice. If the workbook has changed, convert again so the choice uses current input-cell information.
Check the result 
Open the converted preview, try representative values in each input cell, and check the results. The Messages tab reminds you if the workbook has no input cells. See conversion messages and testing your calculations.
Keep field identifiers stable 
Name cells in the workbook when you need stable input and output identities. Do not rename generated HTML identifiers by hand: calculations and widget references depend on them. Verify the actual generated names in your conversion, especially after changing labels or naming settings. For prefilling fields from a link, use the identifiers emitted in the converted page.